

How To Repair Color Wheel Samsung Hlr6167wx/xaa
Introduction
The older model Samsung televisions are plagued with the trouble where the bearings in this color wheels piddling motor go and starts to audio like a banshee, or at least what I imagine a screaming banshee to sound similar. Anyway, it's pretty bad. Hither is how to supplant the goggle box color wheel of your Samsung HLM/HLN-DLP.
-
-
I've got 1 of the early models of the Samsung 43″ DLP Television sets. We've been through a lot together, but it's just a fantastic picture. I love it.
-
The Color Wheel is screaming like a banshee as i mentioned, then here is how to replace it.
-
-
-
Buy a Colour Wheel: I found a few different places that carried this replacement office. The cheapest by far was Partstore.com who carries information technology just over $100.
-
Requirements Listing Below
-
Philips screwdriver, non likewise pocket-size and at to the lowest degree 5 inches long. There's i spiral that's a reach.
-
Tiny (jewler's) screwdriver. Yous may not need this. I needed information technology to get a connector off.
-
Tweezers. I needed them to get to a few screws in tight places.
-
Compressed air. I didn't take this, but I wish I did. It's dusty in at that place.
-
Pen and paper. I took copious notes. If you practise anything that I don't talk nigh hither, y'all should write it down. I carefully documented every cable that I unplugged and every part I removed. Give thanks God I did that.
-
one-ii hours
-
-
-
NOTES
-
In this document, left and right are "stage-left" and "stage-correct", or the left and right sides of the set every bit y'all wait at the dorsum, facing your sofa.
-
Well-nigh all of the screws are identical. You can safely keep them all in the same cup, or pile on the table, or carpeting, or wherever you store the screws.
-
Don't bear upon anything that looks like calorie-free volition shine through it, like the projector lens or the colorwheel itself.
-
DON'T rely on this certificate entirely. Pay close attention and take notes or digital pictures.
-
If y'all were but watching your TV, your projector lamp will be HOT. Let it cool downwardly.
-
-
-
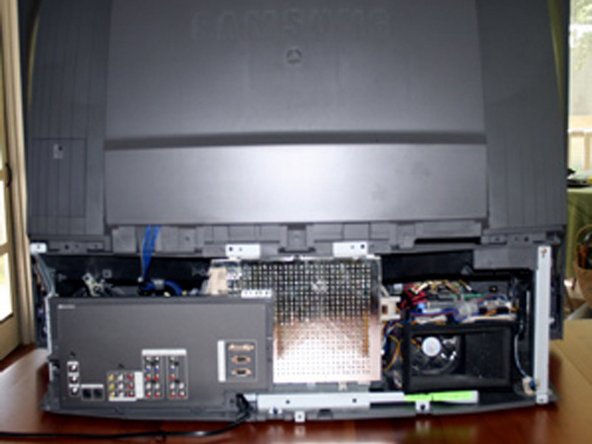
Remove the back panel from the television set. The panel runs the unabridged width of the bottom rear of the ready. In that location'south no demand to remove the access panel for the lamp. That'll come off with the panel. In that location are xiv screws.
-
-
-
Remove the projector lamp. This may be unnecessary, just (a) it let's you lot see your target (the color wheel) and (b) it just seems like the safe thing to do. It'due south easy. Only unscrew the ii brass screws holding it in. Information technology's on the right side of the TV. The screws won't come out, only pull them out with the whole unit by pulling on the handle and sliding it straight out. Carefully shop it somewhere prophylactic.
-
-
-
Remove the panel on the left side by removing 2 screws holding it in place. Carefully slide it and the fastened PC board out a few inches until cables stop y'all. Y'all won't actually need to remove whatsoever cables from this board to become at the color wheel. (Of grade I removed most of them the first time.)
-
-
-
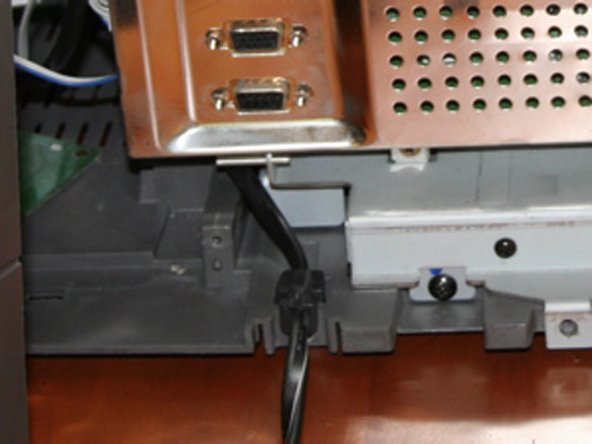
Carefully note how the power cable is positioned in the set, and the route it takes out the back. Once you have done that, pull the ability cord out of information technology's notch in the lesser of the example. It's blocking the next function that has to slide out.
-
-
-
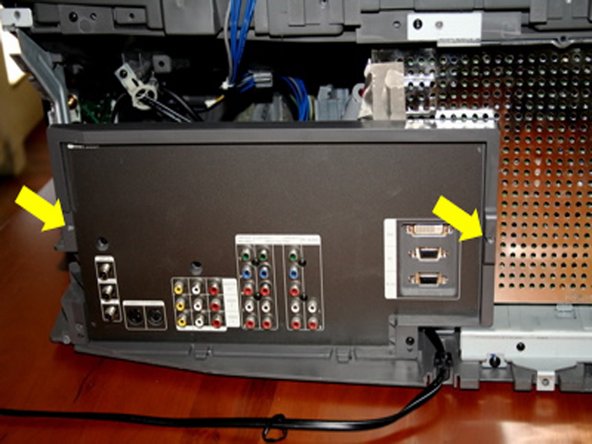
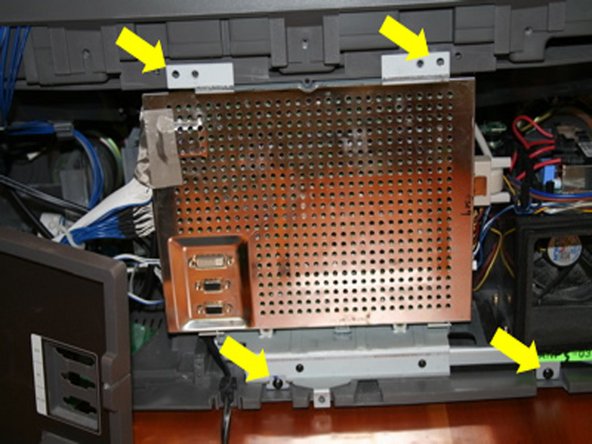
Remove the center panel. Remove the two screws in the lesser that have larger heads than the rest. Yous don't need to take off the regular sized screws that fasten the dorsum panel to the base. They'll all slide out together. Remove the tiptop 2 screws that hold the panel to the plastic instance.
-
Heart panel. The two screws on the bottom have larger heads than the rest. Remember that these get here. At that place are two more than screws on the bottom that hold the vertical panel to the base. No need to remove them. If you do, things get a bit floppy.
-
-
-
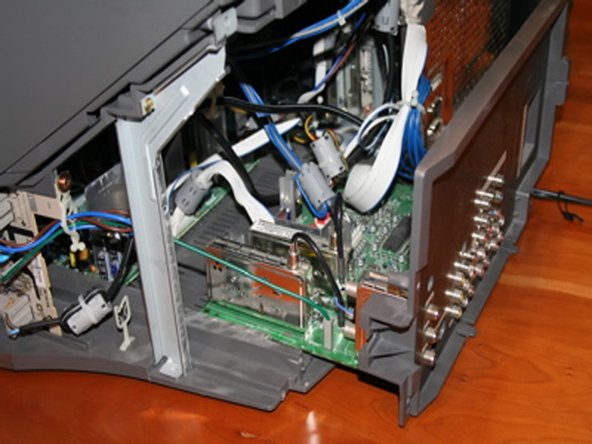
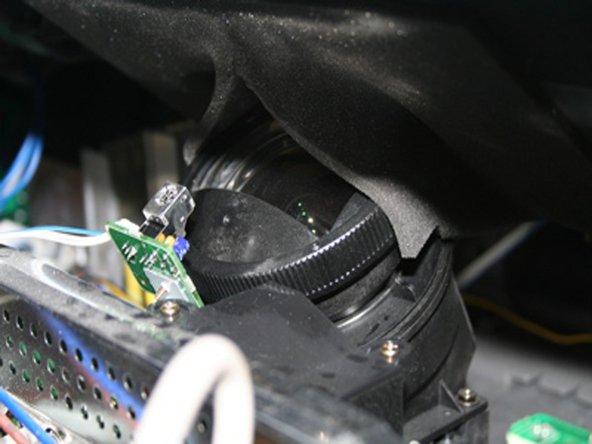
Slide out the center unit of measurement slowly, just a few inches and take a peek inside equally you practise. It'due south a snug fit, and so you'll demand to ease out both the pinnacle and lesser at the same time. Some things to notice as yous do this. Look at how the projector lens is fitted within a foam sheath. Yous'll need to put that back later, so take a good expect.
-
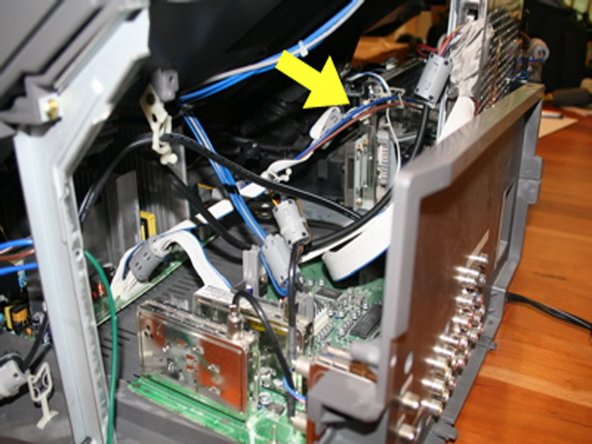
In that location are a few cables on the left side restricting it. Yous'll need to unplug these:
-
blue/brown two-wire power cable. Yous'll need to unplug this from the main prepare.
-
blue/white cable connecting to the left side. Squeeze the plug to unlatch it and remove information technology from the center unit of measurement that you're removing.
-
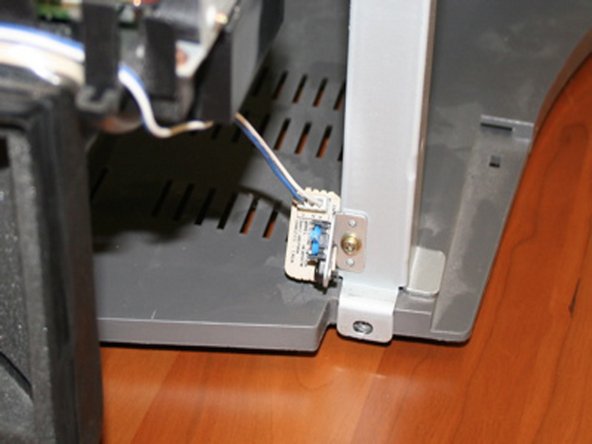
Sensor switch on the right side. Unscrew this from the tv case bracket.
-
-
-
Now you can slide the center panel and all the parts behind it out of the television. If y'all didn't remove whatever cables on the left panel, you'll have to swing everything over to the left to articulate the tv.
-
Notation: Steps 11-13 are removing the bad colour bicycle. I propose doing these steps carefully, equally if yous were going to demand to use this colour wheel again. You never know if yous may need to opposite what you've washed.
-
-
-
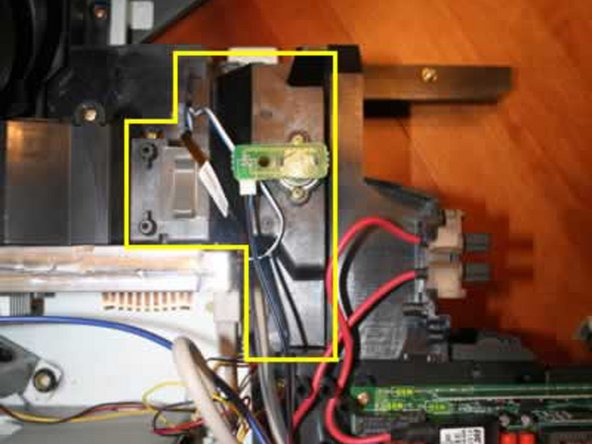
Locate the color wheel cover. It's got a modest green excursion board on tiptop of it with a black/blue wires connected to it. Remove that plug. Also, and this is the trickiest part, remove the ii cables coming from the color wheel. One is a copper-colored ribbon cable. That will only slide out hands. The other is a cable with ii white and one blue wire. This one is tricky to remove, so y'all'll demand to ease it out. I pried it out with a jeweler's screwdriver. DO NOT just pull on the wires.
-
Note: A reader made the following fantabulous suggestion to avoid breaking the white connector on the cease of the bluish/white/white wire:
-
Having replaced quite a few of these colorwheels as a Samsung service tech, I accept found that you do not have to remove the bluish/white wire from the DMD board (avoiding the hazard of damage to the optical engine) In that location is plenty slack in the wire to road information technology around the embrace when removing it. You can so unplug the wire from the old colorwheel and plug it in the new one (the plastic tab will break off the old connector when yous get to remove it,but information technology will notwithstanding fit snugly on the new colorwheel) Using this method I have had no problems reusing the one-time connecting cable
-
-
-
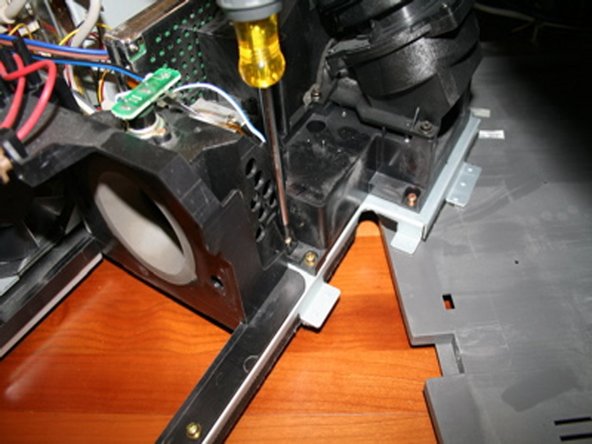
Unscrew the color wheel cover. There are three screws holding it in identify. 1 to the rear of the gear up, and 2 in front. The one to the rear is tucked way in, so I just unscrewed them and advisedly left them in place and pulled them out with the cover. Slide the cover directly up, exposing the color wheel. Equally you lot practice, note where the colour cycle wires go — out the gap in the forepart.
-
-
-
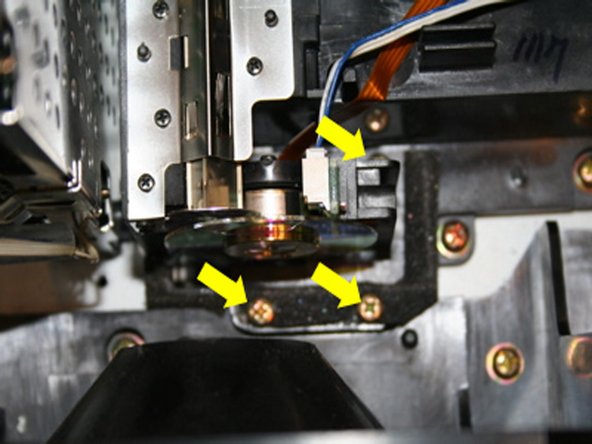
Remove the bad color bicycle. The colour wheel is held in place with three screws. Remove the screws and the color wheel. The colour cycle may be stuck in identify with the foam tape, but that'll requite with a small tug. To remove the cycle cleanly, I lifted the front edge and slid it toward the forepart.
-
-
-
Insert the new colorwheel. Information technology can be tricky to do this without touching the cycle, or bumping the bike into the case. (This is where you demand the nerves of steel). Once y'all go the proper angle, information technology volition slide into place. Don't force it — think, this thing needs to spin at 9000 RPM, it's probably pretty sensitive. At first, I tried to put it in place with the screws already in the holes. This didn't let me to slide it in properly. Lesson learned: put information technology in without the screws and then concur the screws in place with tweezers, if necessary.
-
Put the colour wheel encompass back on with the wires out the space facing the front end of the case. Brand sure the wires reach their destinations, and screw in the comprehend. Three screws. Adhere the three connectors. The metal contacts on the ribbon cablevision confront the rear.
-
Put all the guts back in place. Slide the centre unit back in. Without touching the projector lens, open up up the slice in the cream so information technology wraps around the projector lens, and slide information technology in the residue of the manner. The center unit of measurement can only go in on information technology's track, then over again, don't force anything. Connect the ii wires you lot removed on the left side. They should only go in 1 way. Did I mention don't force annihilation? Spiral the sensor switch onto the bracket on the right.
-
Put the power cable in it's slot. Just the style you noted on the way out.
-
Slide the left PC board and panel dorsum in place. At that place are two screws that hold it in place that you spiral in now, the residual agree on the access panel.
-
Put the projector lamp back in place and spiral it into place. I forgot to practise this both times.
-
Put the access console dorsum on and screw information technology in (xiv screws)
-
Plug in the television set, say a prayer, and turn it on.
-


Conclusion
To reassemble your device, follow these instructions in reverse order.
Embed this guide
Cull a size and re-create the code below to embed this guide as a small widget on your site / forum.
Preview

Source: https://www.ifixit.com/Guide/Replacing+Samsung+HLM-HLN-DLP+Televison+Color+Wheel/2406
Posted by: avilasumbes.blogspot.com
0 Response to "How To Repair Color Wheel Samsung Hlr6167wx/xaa"
Post a Comment